|
How to Fix the Mess in the Microwave
There is no greater compliment to your cleaning skills than someone commenting that your microwave oven is the cleanest they have ever seen. You’ve never heard someone say that about the microwave in your kitchen? Then let’s get to work! Microwaves are known to be messy. After all, they are designed to warm up food, and usually, that involves spills, spatters, and for some food items, explosions. Who hasn’t put something in the microwave to heat it up only to hear that dreaded POP as it expanded and flung remnants all over the inside of the oven? Some of you may be diligent with covering up food you are warming, but most of us… just hope for the best. And when that fails us, here are a few practical tips to a perfectly clean microwave oven. Start smart The first step to cleaning a dirty microwave oven is to wipe up as much excess food particles you can. Spraying them just means a smeary mess. Use a dish cloth or paper towels to remove food particles, paying special attention to the inside of the door and corners, where particles can build up over time. Steam it up Nothing works better than a little preparation. Take an uncovered bowl of water and put it in the microwave and cook it for two or three minutes. The steam and heat of the water will help loosen the grease and remaining food particles for easier removal. This head start is a very smart way to clean your microwave oven. Wipe it all down It’s best not to spray the interior with just any cleaning solution. What you smell might end up in your food. Residues and odors can affect the next dish you prepare. Instead, use a cloth, hot water, and dish detergent as your cleaning arsenal. With the dampened cloth, wipe away greasy residues and food particles, repeating often until you have a squeaky-clean surface. You can also put the dampened cloth on really stubborn areas and allow the detergent to work a few minutes and then wipe it away. When you are done, dry it all with fresh towels and inspect, recleaning any areas of concern. Of course, to really get something clean in your home, do the right thing. Call your favorite cleaning company. After all, it pays to call a pro! The Often-Forgotten Vacuum Bag
Vacuum cleaners are an integral part of life for any family and a common tool used daily in commercial buildings. While the vacuum hums along doing its job, picking up dirt, grit, debris, and potential contaminants, there is a part of the vacuum we might not think about that often. You usually can’t see it… but it’s right there, inside your vacuum cleaner — the bag. The vacuum bag is the repositor of all substances that the vacuum collects through the beater bar or suction assembly and hoses. Unless you use a bagless vacuum, and there are some on the market today, all air goes from the surface being vacuumed and through the vacuum bag. The air you breathe around a vacuum is partly the air that has passed through the unit. Problem detected You know you have a problem when you turn on the vacuum cleaner and notice a foul odor. What you are detecting is the result of organic and inorganic matter inside the vacuum bag that has had time grow microorganisms that create odors. A vacuum bag that has sat a long period of time without being changed or cleaned can produce significant bad odors. While your vacuum cleaner manufacturer will have recommendations on the frequency of changing the bag, those are simply general recommendations. Professional carpet cleaners recommend changing a bag when one-half to two-thirds full. Is that enough? The nose knows In addition to following a schedule, use some common sense. Remember that a vacuum bag in the dark that is stuffed with organic soils will quickly become an odor-causing source. If you vacuum every day, you may not notice it. But give it a week or two, and the odors become evident. At the first hint of an odor, change the bag. Even if you vacuum once or twice, and put the vacuum away for several days, it may be good to change the bag before using it again. Bags are cheap. Your health is not. Professionals cleaners often change the vacuum bag and clean all equipment before going from one home to the next. The do this to avoid cross-contamination. Their basic principles of equipment maintenance keep you and your family safe. When it comes to the absolute best cleaning of all surfaces, do the right thing. Call your favorite cleaning company. After all, it pays to call a pro! 575-937-4385 A Litter Help
Cats are responsible for many things, such as making you happy when they snuggle up to you, making you cheer when they rid your house of a mouse, and giving you something to do with the camera app on your smartphone. They do a lot to bring people happiness, but they also need quite a bit of attention at the same time. Besides feeding them, taking them to the occasional veterinarian visit, clipping their claws, and generally making them happy, you have something unpleasant to deal with: The litter box. Unless you have a fancy one that is self-cleaning, you have to do the scooping because your cat isn’t going to do it for you. And more than just scooping is involved with the chore. Here are a few tips to give you a “litter help” with the cat box (pun intended). The first thing to consider is a schedule. Don’t just clean the litter box when you smell it or the cat(s) start kicking out some gross objects. It’s good to do it every day, or every two days, so it stays hygienic and doesn’t start to smell. Make it a habit, the frequency of cleaning. Wear rubber gloves and use a scooper meant for the task and scoop out the waste into a plastic bag. DO NOT toss it all in the toilet, as that will just plug up the plumbing and then you have another task to handle. Close the bag up and discard it into the trash can, preferably one outside. Just adding the clumps to your regular trash can in the kitchen means you will have an odiferous situation on your hands within an hour or so. Bag it, close it, toss it. Depending on how many cats you have, completely change out the litter on a schedule as well. This should be done every 3-4 weeks. Completely empty out the pan, and carefully rinse it out, using detergent and hot water, but be careful not to make bigger mess. Remember that most cat litter clumps when wet. Finally, placement of the litter box is important. It needs to be in an area not too close to the nose, if you know what we mean. The litter will come out, either kicked by the cat(s) or tracked out on paws. Sweeping it up is part of the job. And once in a while, your cat(s) cause “accidents” and bad odors can become part of your carpet, furniture, and other textiles. When that happens, do the right thing, and call your favorite cleaning company. After all, it pays to call a pro! 575-937-4385 A Time for Reflection Cleaning windows is a common chore, and many people will schedule an entire day or more to it during spring or annual cleaning. It involves removing screens, climbing up on ladders, stepping over shrubbery, a little huffing and puffing, among other challenges. When cleaning your windows, don’t forget the interior glass that can get neglected. That’s right, the mirrors in your home. If you keep your mirrors clean, you might even look better when you gaze at yourself! Cleaning mirrors may seem like a simple task… but like with all household tasks, there are proper, best-practice steps that make the job easier, better, and save you time as well. Supplies As with window washing, you can use a scrub tool and squeegee on mirrors, but that’s not very effective on smaller surfaces and especially those not perfectly flat. Most will opt for a quality glass cleaner, one that limits streaking. You can find plenty of options at your grocery or department store. If you are the do-it-yourself type of person, you can also make your own. Most cleaning products are, after all, water based. In a trigger sprayer, mixing up a few cups of water with a few drops of dishwashing detergent and about a cup of rubbing alcohol makes a great homemade alternative as a glass cleaner. The rubbing alcohol helps with evaporation. Some recipes call for a few drops of vinegar as well. Can’t hurt! You also need lint-free towels. Many use disposable paper towels but make sure they are higher quality as you don’t want them falling apart when you use them. Wiping off edges and streaks is essential to a good glass cleaning job. Cleaning tips The actual cleaning is pretty simple, but you must be thorough. Apply/mist on a small amount of solution, wetting out the entire surface. Using your towels, work over the surface until all the moisture is evaporated and then keep wiping. Use a zig-zag pattern, turning over the towel and using the dryer side when you can. A final wiping with a clean, unused towel should finish off the job. Make sure the room is well-lit. Look at the glass from all angles. What might look fine from one side of the room may look terrible from the other side. For all your best cleaning tips, and to get some help with all your cleaning tasks, call your favorite cleaning company. After all, it pays to call a pro! 575-937-4385 How to Remove Wax from Surfaces
Wax is a big part of everyday life. You use candles to add a nice warm glow to your home, and to add a pleasing scent as well. You wax your car to give it a nice shine. You use wax to remove unwanted hai… oops, let’s not get too personal. But you get the picture. Wax is beneficial, handy, it has many uses, but when it is spilled onto a surface by accident, it can be a tough challenge to clean up. As you know, when wax is spilled, it is hot and can really stick to surfaces, especially fabric like carpet or upholstery. Here are a few useful tips you can implement when cleaning up wax. Carpet, furniture, and fabrics There’s no point in hurrying. Once it hits the surface, it hardens up faster than ice cream disappearing in front of a teenager. But once it hardens, you may be able to break up the wax and pull it off the fabric. BE CAREFUL not to damage the fabric, especially furniture. You can choose cold or hot treatment. You can freeze the wax with ice cubes and break it off, or you can warm it up for removal. You can do this with a hair dryer, clothes teamer or even a clothes iron if you use the lowest setting and keep a damp towel between the iron and the surface, and just dab at it to transfer the wax. If you can warm up the wax to melting temperature, you can remove it. The color left behind will most likely need the attention of a cleaning company. Hard surfaces This is easier. You have several approaches. Whether glass, wood, tile, or other hard surfaces, simply scrape (be careful not to scratch the surface) the wax off. If stubborn, you can also warm up the wax with a hair dryer or clothes steamer and then wipe it off. An oily residue may remain, and you can use a hot detergent and towel to remove that. Some recommend rubbing alcohol as the solvent of choice. Prevention – and the best cure Of course, being careful not to spill the wax is the smart thing to do, but accidents do happen. And when they do, and you need help, reach out to your favorite cleaning company. After all, it pays to call a pro! 575-937-4385 Dive into Spring Cleaning
When the temperature is climbing up to an acceptable level and flowers are flexing their muscles, when the birds are singing and you are in a (generally) better mood, that just might mean that spring has arrived. And with that comes the unignorable urge to clean everything in sight. Spring cleaning is an age-old tradition that grips virtually everyone with a home or apartment. It’s that annual event likened to a pilgrimage that means you discover all kinds of things, such as “What in the world has been growing behind the refrigerator?” and “Just how many spiders lived in our basement this winter?” Spring cleaning needs to be strategic, not a haphazard running around the house with a feather duster in one hand and the vacuum in the other. The first step is to prioritize. Which areas of the house need attention first? Which will take the most time? Which will make the most impact (positive) on creating a cleaner, healthier home? Make a list. What you will do with the high-touch points, dusting, vacuuming, moving furniture, special tasks such as window washing or oven cleaning. Also add in what you need professional services for, such as carpet and furniture cleaning, hard floor care, and similar tough jobs that give you a migraine just thinking about them. Create a schedule. While some may have a few days they can put against spring cleaning chores, many must split it up. Make it manageable. After you create your list and priorities, get out the calendar and map it all out so your plan gets some life to it. Nothing feels as good as checking off those cleaning tasks over a period of time. Take your time. When dusting, vacuuming, or another cleaning task, don’t hurry through it. There’s nothing as valuable as a thorough, diligent cleaning of surfaces. Moving that vacuum slowly over the carpet means you are pulling more dry soil, which means less dust “coming back” after spring cleaning is over. You will also be “getting rid of stuff” during the spring-cleaning process. Sentiments may come into play. Although that elephant shaped planter in the back corner of the basement came from a favorite third cousin (what is her name, anyway?), you have never introduced anything resembling live growth to it. Maybe just get rid of it, along with all that other stuff that you know you won’t use in this lifetime. And when it comes time to get some expert help with your cleaning tasks, do the right thing. Call your favorite cleaning company. After all, it pays to call a pro! 575-937-4385 The Tenacity of Soap Scum
Soap scum is an irritating by-product of cleaning, especially in tubs, showers, and sinks. It’s ironic that a product you use to clean with creates problems on surfaces. And besides just soap buildup, what’s encased in the soap scum includes body oil, dead skin, bacteria, dirt, and more. This is why you may notice a foul odor as the soap scum gets thicker over time. Using liquid soap instead of bar soap will hinder soap scum buildup, because bar soap contains products that tend to create a film. Wiping down surfaces in your tub, shower, and sinks after you use them also helps. And there are specialty products you can mist onto surfaces routinely that will hinder the buildup of film. But when soap scum strikes, here are a few easy steps to follow to remove it. Mix up equal amounts warm water and white vinegar and add a small amount (just a drop) of dish detergent. Use a spray bottle and liberally apply to the soap scum, give the solution several minutes to work, and wipe it off. Keep repeating until the soap scum is gone. The small amount of dish detergent acts as a surfactant and penetrates the soap scum, and the water/vinegar mix helps break down the elements that created the scum. Mixing up a paste of baking soda and vinegar also works. Use about a half cup of baking soda in a small bowl, add just enough white vinegar until it becomes a paste. It will fizz for a while, and once it is done fizzing, apply to the areas you wish to treat. This is especially effective in areas such as where you leave a bar of soap and the scum is really thick. There are some cleaning products you can purchase at your favorite department store that also work on soap scum. They are applied directly to the surface and bubble and fizz and make removal much easier. All three of these solutions will work for you, but as with all cleaning activities, it takes time, elbow grease — aka scrubbing — to get the job done. Rinse it all off and wipe dry to really see how effective you were in removing the soap scum. But when you really need some cleaning help and tips, do the right thing. Call your favorite cleaning company. After all, it pays to call a pro! 575-937-4385 Do you want your carpets to last longer and look cleaner all of the time?
Hello Friends! If you answered “Yes!” to the question above, then be sure to take a quick look at these… 1. Vacuum frequently and thoroughly. Dirt is the number one cause of wear and tear to your carpet. Be sure that you are vacuuming thoroughly at least once per week to keep the dry soils to a minimum and maximize the life of your carpet. 2. Clean up spots and spills swiftly and properly. To properly remove a spot, use a clean absorbent towel (preferably a white one to avoid color transfer) and hot tap water in a spray bottle containing a small amount of a mild detergent – just make sure the detergent does not contain bleaching agents. Next, alternate blotting and spraying the area, DO NOT over wet the spot. You can even place a dry absorbent towel under something heavy like a book to completely remove the moisture from the carpet. Most spots can be removed if they are caught early. Of course, the exceptions are, if a spill contains a dye, (i.e., red juice) or a bleaching agent then the spot is usually permanent. 3. Never scrub or rub spots. The correct method to remove a spill is to scrape the spot towards the middle and then blot with a white towel or cloth. Scrubbing or rubbing the spot will fray the carpet fibers and permanently damage the area. 4. Do not overuse carpet detergents, shampoos or spotters. Some people are addicted to their carpet spotters, but too much detergent in the carpet will result in a dirt attracting residue that will make your carpet appear dirty faster. 5. Clean your carpets professionally every six months. Carpet manufactures recommend cleaning your carpets profession- ally with van mounted steam cleaning. By cleaning every six months you will extend the life of your carpet and have a healthier, cleaner home. 6. Re-apply “Carpet Protector” every other cleaning. Carpet protector “seals” the fibers of your carpets and makes them resistant to most household stains. It also makes your vacuuming more efficient. The effectiveness of carpet protector is reduced about 30-35 percent with each cleaning. But, by re-applying at least every other cleaning you will continue to protect your carpet from stains and everyday wear and tear, giving your carpet the longest life possible. After all, it pays to call a pro! CLC Extreme Clean Carpet Cleaning 575-937-4385 Stinky Garbage Disposals
Your garbage disposal is probably one of the devices in your home you seldom think about. After all, it’s hidden from view, you activate it with a simple flip of a switch, and it does its job. But if it ever fails you, it quickly jumps to the top of the list of things you value most. Your garbage disposal is, obviously, fitted to the drainpipe of your kitchen sink, and it grinds up all kinds of food waste, gunk, and more. It works diligently to gobble up and push into the sewer system what you should put and what you should never put into a disposal, which shortens the life of the device. Safety first It should be obvious to most that putting your fingers into the garbage disposal is a bad idea. Even when the unit is turned off, never reach in an attempt to dislodge or remove something that is hindering the garbage disposal’s efforts. And when working in the disposal unit, always unplug or turn off the power before proceeding. It’s always best to call a pro in those circumstances when a simple, quick fix is not an option. Disposal tips While your garbage disposal might seem like a superhero, it is not. You can put many food and other items down through the disposal, but some will create future problems. And the following advice will be tempered or adjusted by the type of garbage disposal you have. Some find their disposal will dispose of anything. Others find they have to be very selective on what they put into the disposal. Smaller portions are better. Avoid greasy foods, fruit pits/seeds, bones, pastas and rice, nuts, coffee grounds, and any other substances that might build up in your sewer system. Maintenance Taking care of the health of your garbage disposal is important. Weekly — and no less than monthly — let your disposal while running gobble up some baking soda and vinegar. You can put both down the drain slowly and if you see foam develop, that’s fine, it’s normal. Alternate disposing of ice and also hot water. This helps with removal of the different types of debris that may attach to the blades of the garbage disposer. There are times when advice is just not enough. Do the right thing. Call your professional cleaning company. After all, it pays to call a pro! 575-937-4385 Soot is a residue that can be on any surface in your home. It can come from sources such as your furnace system, a fireplace, candles you burn, and other combustible sources that don’t burn clean.
Some soot is dangerous, such as from a fire or furnace puff-back. Skin contact with these types of soot should be avoided, as they may contain hydrocarbons that are classified as human carcinogens. Outdoor soot is even regulated by the EPA, classified as a criteria pollutant. Soot is usually handled by restoration professionals as it is often a by-product of a disaster event, although it may be minor, such as extra smoke from a fireplace. But many types of soot, such as found in your kitchen or from candles, light soot, can be handled with regular restorative cleaning. Just be smart when deciding to clean soot from surfaces. Wearing appropriate personal protective equipment is a must when restoration pros do it, so keep that in mind and wear protective gloves, eye protection, and anything you need to keep the soot residues off of your skin and out of your lungs. The first step with soot is with simply dry wiping. It may come off the surface easily, especially if the surface is non-permeable. You will still need to wet clean that surface for final residue. Most likely, the soot needs to be cleaned with hot water and detergent, since it is often greasy. Applying some detergent solution and allowing approximately 10 minutes of dwell time should loosen the soot and you can wipe it away. There are also special cleaning products for soot-type greasy soils. The same cleaning principles would apply. But if the soot is on a vertical surface, your approach needs to be more careful. Clean from the bottom and move up, just a few inches at a time. If you start at the top and work down, any wet residue that runs down the wall may create permanent stains. So manage the moisture and soot removal from the bottom going up, and you won’t have this issue. If, after cleaning, soot stains remain, it may be time to think of repainting. Of course, soot cleaning is really something that restoration pros can handle. Do the right thing. Call your favorite restoration company. After all, it pays to call a pro! Dirt and grime can be found in most places and are part of life. The goal most of us have is to keep all of it outside, where it belongs. But inside it comes, sometimes with a vengeance. In the air. On shoes. Tracked in by pets.
But what about dust? Is dust a simple type of soil that floats in the air, that you can see hanging in the sunlight coming in a window? That’s a common belief, yet you would be surprised at what composes dust in your home. Dust can be pet dander, skin cells, dust mite excrement, flooring materials breaking down, and, of course, just regular fine soil that has made its way into your home. Much of this may be allergen triggers for those in your household, so keeping your home as dust-free as possible is important. It’s a simple matter to dust a surface, but another one entirely to do it thoroughly and to remove dust from those hard-to-reach areas. Sometimes, our dusting efforts actually create more problems, as we might simply put the dust in the air or just move it around. Here are a few best practices to consider. As you work, think of your own lungs and perhaps wear a mask appropriate for dusting. If you have allergies, this is very important. Tip #1: To keep dust in its place, start at the top of a room and work your way down. Top to bottom. If you don’t collect all the dust with the cleaning cloth you are using, it should fall down, and you can get it as you keep working. Tip #2: It’s always best to use a moistened cloth rather than a dry cloth, if the surface can be cleaned with moisture. This way you easily collect the dust as you work. Turn the cloth over or rinse it out often. You want to remove dust, not redistribute it. Tip #3: For hard-to-reach areas, many might just skip cleaning. Don’t do that. Think smart. You can use long-handled dusters that collect dust and don’t sweep it away. You can use flat-mop type dusters for the sides of appliances. Also, think about vacuums with attachments to suck up the dust under furniture or behind heavy items that can’t easily be moved. Of course, the best option is to call your favorite cleaning company and let them handle the entire job, giving you time to do something you enjoy. After all, it pays to call a pro! 575-937-4385 Dust(less) Best Practices
Dirt and grime can be found in most places and are part of life. The goal most of us have is to keep all of it outside, where it belongs. But inside it comes, sometimes with a vengeance. In the air. On shoes. Tracked in by pets. But what about dust? Is dust a simple type of soil that floats in the air, that you can see hanging in the sunlight coming in a window? That’s a common belief, yet you would be surprised at what composes dust in your home. Dust can be pet dander, skin cells, dust mite excrement, flooring materials breaking down, and, of course, just regular fine soil that has made its way into your home. Much of this may be allergen triggers for those in your household, so keeping your home as dust-free as possible is important. It’s a simple matter to dust a surface, but another one entirely to do it thoroughly and to remove dust from those hard-to-reach areas. Sometimes, our dusting efforts actually create more problems, as we might simply put the dust in the air or just move it around. Here are a few best practices to consider. As you work, think of your own lungs and perhaps wear a mask appropriate for dusting. If you have allergies, this is very important. Tip #1: To keep dust in its place, start at the top of a room and work your way down. Top to bottom. If you don’t collect all the dust with the cleaning cloth you are using, it should fall down, and you can get it as you keep working. Tip #2: It’s always best to use a moistened cloth rather than a dry cloth, if the surface can be cleaned with moisture. This way you easily collect the dust as you work. Turn the cloth over or rinse it out often. You want to remove dust, not redistribute it. Tip #3: For hard-to-reach areas, many might just skip cleaning. Don’t do that. Think smart. You can use long-handled dusters that collect dust and don’t sweep it away. You can use flat-mop type dusters for the sides of appliances. Also, think about vacuums with attachments to suck up the dust under furniture or behind heavy items that can’t easily be moved. Of course, the best option is to call your favorite cleaning company and let them handle the entire job, giving you time to do something you enjoy. After all, it pays to call a pro! 575-937-4385 Wonderful Wood Floors
Cleaning and maintaining hard surfaces is a task that can really enhance the appearance and value of your home. While most hard floors respond well to routine cleaning and maintenance, there are still challenges inherent with natural wood flooring materials that require your special attention. The first challenge is a gritty one. Speaking of soil, of course. Any type of soil on a surface acts as a natural “sandpaper” and slowly but surely damages the surface as it is walked on. This can happen to carpet and hard floors, but it’s the appearance of hard floors that will show the damage. Imagine putting some sand on plexiglass and walking on it for a long period of time. The surface is going to get scratched and you will see it. The same is true of hard floors. Carpet may hide the issue to some degree — hard floors do not. The key to protecting your wonderful wood floors is daily maintenance. Don’t let a day go by without sweeping or, even better, using a dust mop on the floor. It doesn’t take long to do this, just a few minutes, but keeping that gritty soil off the floor will protect it. Choose a quality dust mop wide enough to make quick work of the chore, but not too wide that you can’t get into tight areas or corners. There are special vacuum cleaners for hard surfaces that work great as well. At least once a week, completely clean your wood floors. This means after removing the dry, gritty soil, deep clean the floor with warm detergent solution. Choose a detergent for your type of floor. A quick online search should provide you with the best product type. Keep moisture to a minimum but enough to dampen the floor as you clean it, removing oils and contaminants as you work. Rinse out and repeat several times until you are confident your wood floors are “squeaky clean.” When you come across specks or soils that stick to the floor, scrape them off with your fingernail or a sharp blade, but be careful not to scratch the floor. Of course, the best way to care for your wood floors is to use experts who know exactly how to maintain them. Contact your favorite cleaning company today. After all, it pays to call a pro! 575-937-4385 How to Remove Ink Stains from Clothes
Has this, or something similar, ever happened to you? You put on a nice, fresh shirt and head out the door. When you arrive at your destination and are chatting with friends or colleagues, someone points at your shirt and asks, “What’s that?” You look down, and a small blue or black spot is starting to grow. That’s right, the ink pen in your pocket is leaking. Or perhaps your nice, fresh shirt or other item of clothing has a small spot on it, and you learn it was from simply touching an ink pen to your shirt and the ink transferred to it. It’s small, but everyone sees it. An embarrassing moment, one you wish you could have avoided. This type of stain doesn’t just wipe off. It takes a lot of effort to remove an ink stain, and if you don’t do it right, you will just make the situation worse. Ink spreads and migrates out, creating a bigger stain as you work on it. While not an easy task, here are some tips to make ink stain removal a little easier for you. But remember, this isn’t typical cleaning, it’s aggressive, so there is always the chance of damaging the fabric. Hair spray: Using an aerosol version, alcohol-based, apply liberally to the stain. Work it in and dab at it with a white paper towel. Hair spray sometimes works because the alcohol disperses some inks. Wash immediately. Acetone: The ingredient in traditional nail polish removers, acetone is a very dry solvent that will work on ink. When you saturate the ink stain, it will dissolve and migrate so be ready for that, working your way from the outside in, to limit spreading. In addition to acetone, other liquid dry solvents, such as rubbing alcohol, can be used. After application, wash immediately. Detergent treatment: Use a product meant to pre-treat laundry and apply to the ink stain liberally, work it in, from the outside in to limit spreading, and then wash immediately. No matter the type of treatment you use, washing the garment will help remove more of the ink. Be sure to wash separately, and do not dry the garment until you are satisfied with the ink removal results. When you dry an item of clothing, attempting to remove more of the stain is often futile. And remember that true fabric cleaning experts know how to remove ink stains. When you have a challenging cleaning situation, do the right thing. Call your favorite cleaning company. After all, it pays to call a pro! 575-937-4385 How to Remove Adhesive Residues
When something is stuck — and you don’t want it to be stuck — that can be a problem. This is especially true when it comes to tape, glue, and other sticky stuff we use all the time in our homes and businesses. You can use soap and water, you can scrub, you can get red in the face… but when it comes to proper adhesive residue removal, there is a better way. Scrape it off If the adhesive residue is on a flat, hard surface, using a straight razor blade can remove the majority of the residue. It basically slices it off the surface. But be careful you don’t scratch the surface, especially wood and natural materials. If that happens, you have permanent damage. After scraping, you will still need a little dry solvent, such as rubbing alcohol or acetone, to remove what’s remaining. A few seconds of contact time is all that is needed. Dissolve and remove If the adhesive residue is on a soft surface, such as carpet, furniture, or clothing, you can’t scrape it off. You need to dissolve the residue and then blot or rinse it away. This isn’t easy. If you apply too much dry solvent (rubbing alcohol, acetone, etc) you can delaminate the fabric if it has a backing. You can also dissolve glues that are part of the fabric. It’s best to add a small amount of dry solvent to a white, cotton cloth that you can dispose of, and blot at the residue. Several applications will be necessary, depending on the type of residue. The challenge is the adhesive residue does not dissolve in anything but a dry solvent. Yes, you can use high heat and hopefully soften the residue for removal, but that is problematic at best. One big issue is when tape is used on carpet. Even if you remove the tape and clean the residue, over time, that sticky residue remaining will collect soils, such as from foot traffic. A dark line will form. Repeated cleanings will help, but this is an often-frustrating task. The real solution is to get some advice from your favorite cleaning company. Carpet and furniture cleaning companies deal with adhesive residues every day and know what to do. Let them handle this for you. After all, it pays to call a pro! 575-937-4385 How to Find the Very Best Cleaning Company
Most of us are very busy people and must prioritize our activities. One necessary activity is cleaning our homes. Sometimes, we rush through it and don’t do the best job possible. Life happens… but a lack of time doesn’t mean you have to put up with dirt, grime, and clutter. The best solution is to find a cleaning company to handle challenging cleaning issues you face, such as carpet cleaning, furniture cleaning, hard floor care, and more. Professional cleaners understand the proper procedures for disinfecting, as well. When looking for a professional cleaning company, whether for regular housecleaning services or specialized cleaning, such as carpet or furniture care, there are a few specific strategies you should implement. Referrals One of the best ways to find any company to do anything for you is by referrals, such as from family or friends. This process automatically filters prospective companies for you, as referrals are provided to you by those you trust and have similar interests. After all, when you enjoy a nice meal at a good restaurant or have a great experience with a service company, what is your natural inclination? You want your friends and family to have the same, great experience. So you tell them about it, and they trust that what you are sharing with them is true. Ask around. Inquire of your family and friends in your local area who they use for cleaning services and ask for their honest opinions. The information will be invaluable. Reviews Second to referrals are reviews, usually online reviews such as with Google or Yelp. This is a proven way to filter out the good from the bad and find companies that usually treat their customers the way you want to be treated. Be sure to use companies that have several reviews, over a long period of time. A long track record is best. Interview them Don’t be afraid to get a prospective company on the telephone or have them out to your home and ask questions, such as with any unique guarantees they might offer. Don’t look for the cheapest deal. Look for quality. Discuss with the company owner or manager what they can do for you. Let them know you are seeking out a quality company. All of this takes time, but the end result is you will find the very best cleaning company for your home. After all, it pays to call a pro! 575-937-4385 The Often-Forgotten Vacuum Bag
Vacuum cleaners are an integral part of life for any family and a common tool used daily in commercial buildings. While the vacuum hums along doing its job, picking up dirt, grit, debris, and potential contaminants, there is a part of the vacuum we might not think about that often. You usually can’t see it… but it’s right there, inside your vacuum cleaner — the bag. The vacuum bag is the repositor of all substances that the vacuum collects through the beater bar or suction assembly and hoses. Unless you use a bagless vacuum, and there are some on the market today, all air goes from the surface being vacuumed and through the vacuum bag. The air you breathe around a vacuum is partly the air that has passed through the unit. Problem detected You know you have a problem when you turn on the vacuum cleaner and notice a foul odor. What you are detecting is the result of organic and inorganic matter inside the vacuum bag that has had time grow microorganisms that create odors. A vacuum bag that has sat a long period of time without being changed or cleaned can produce significant bad odors. While your vacuum cleaner manufacturer will have recommendations on the frequency of changing the bag, those are simply general recommendations. Professional carpet cleaners recommend changing a bag when one-half to two-thirds full. Is that enough? The nose knows In addition to following a schedule, use some common sense. Remember that a vacuum bag in the dark that is stuffed with organic soils will quickly become an odor-causing source. If you vacuum every day, you may not notice it. But give it a week or two, and the odors become evident. At the first hint of an odor, change the bag. Even if you vacuum once or twice, and put the vacuum away for several days, it may be good to change the bag before using it again. Bags are cheap. Your health is not. Professionals cleaners often change the vacuum bag and clean all equipment before going from one home to the next. The do this to avoid cross-contamination. Their basic principles of equipment maintenance keep you and your family safe. When it comes to the absolute best cleaning of all surfaces, do the right thing. Call your favorite cleaning company. After all, it pays to call a pro 575-937-4385 Cleaning Supplies Everyone Needs
Cleaning is an important part of our lives. It’s in our DNA to keep things as clean as possible, although some of us might be accused of allowing a bit of clutter at times. What makes life easier is when we have the best cleaning and equipment supplies for the task at hand. You not only want to do the best cleaning you can but also keep productivity high and save time. Cleaning high touch points Especially during the COVID-19 pandemic, the topic of cleaning and disinfecting high touch points was at the forefront. To do this, you need appropriate cleaning solutions partnered with an EPA-approved disinfectant, the ability to deliver the products to the surface, and a way to wipe or clean the surface. Purchase your products in spray bottles or put your products into quality spray bottles, but as always, follow directions from the manufacturer. If you transfer products, be sure to properly label everything so there is no confusing what is being used. Store all products out of the reach of children. Quality cloths, such as from cotton or polyester microfibers, help pick up and remove soils and contaminants from high touch points. Maintaining the floors Make sure you have quality brooms and mops for cleaning your floors, along with a floor cleaning solution. The bristles of your brooms should be small in diameter and packed tightly, so debris doesn’t get left behind as you work. Flat mops can be used for sweeping as well; you have plenty of options. Investigate how modern mop heads have improved over traditional string mops. Purchase quality products, and yes… you will pay more, but it will be worth it. Your vacuum cleaner should be high quality as well, with HEPA filtration abilities. Empty your vacuum after each use if you use a bagless cleaning unit or change your vacuum bag when ? full or less. Change it if you ever notice a bad odor coming from the vacuum. Odds and ends A wide array of brushes, scrub pads, cleaning cloths, and cleaning solutions for all surfaces are what smart cleaning enthusiasts have at the ready. A spotting kit for your carpet and upholstery will come in handy. Of course, the best thing is to call your favorite cleaning company to do it for you. After all, it pays to call a pro! 575-937-4385 How to Remove Nail Polish
The job of nail polish is to go onto the appropriate surface (fingernails, toenails) and stick. The problem is when nail polish gets onto unintended surfaces, especially on carpet, upholstery, or clothing. It can be nearly impossible to remove. Aggressive efforts on your part, rubbing or scrubbing, and using harsh chemicals can damage the surface while the nail polish still lingers. Removing nail polish, while one of the toughest cleaning chores, can be made easier with these tips. Let’s assume the nail polish has dried, since very fresh nail polish is fairly easy to remove with a typical nail polish removal product and white disposable towels. The right stuff Obviously, nail polish remover is the best choice for a cleaning solution. Using a non-acetone solvent product is safer for some fibers and less aggressive, but your results may be limited. Using an acetone-based fingernail polish remover will have more noticeable effect, but also will dry out your fingertips. This type of product will evaporate very quickly, so when using it realize the contact time must be limited. You can also use other solvents to remove nail polish, and most professional cleaning companies have an arsenal at their disposal. You may be limited to what you can get at the grocery store. That being said, pure acetone is usually the best solvent choice for the impact it has on dried nail polish. When applying your solvent, put it on a disposable white paper towel or cotton towel, and dab at the nail polish. You should see transfer to the towel. Keep at it, but don’t rub or scrub, and don’t spread the stain. Do your research on the type of surface you are working on. Acetone will dissolve some fibers. It will also remove paint, furniture finish, and many other finishes. Remaining color After you have removed as much of the nail polish as possible, you will probably notice some remaining color. This is where you have to be careful about your next product. Using some regular household hydrogen peroxide is safe on most surfaces, but there are no guarantees. After all, if it removes color from nail polish, it can remove other colors as well. But it is a last resort way to continue to work on the stain after other attempts. The best choice Your favorite cleaning company has removed many tough stains just like nail polish. If you want the very best results, do the right thing. Give them a call. After all, it pays to call a pro! 575-937-4385 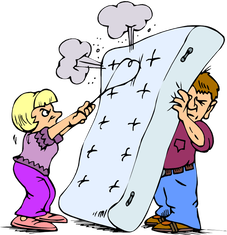 Mattress cleaning, due simply to the bulk of what needs cleaned, is not an easy task. Yet it is one that must be done occasionally. There is nothing worse than putting your sleepy head into the mattress and be woken up.
Besides the typical use of a mattress, which to everyone who loves to sleep is very important, you still want to keep things healthy. There are all types of issues with mattresses, from pet accidents, food and drink spills, dust mites, and more. So here is what you want to do. Strip the bed It makes sense to strip the bed of linens and blankets. If you have a mattress pad, even better. Do this on a weekly basis, at minimum. Keeping a mattress pad on at all times is smart. You must also consider the bulk of the material and do your cleaning accordingly. Sad to say, this may not be possible to do yourself, without much effort. One thing you can do is take the mattress outside and, on a nice day, allow the air to help refresh your mattress. Use peroxide A natural disinfectant that not only make things healthier but that removes stains, peroxide is a great solution. It adds oxygen to the surface and removes not only stains but also odors. Baking soda Some say and claim that baking soda is a solution. The benefit of baking soda is it absorbs odors, much like what you experience with putting an open box of baking soda in your refrigerator. Enzymes Enzymes are great options that can help with stubborn stains, such as blood, urine, and more. They attack substances and remove not only spots and stains but also odors. When in doubt, do the right thing. Call your professional cleaning company. After all, it pays to call a pro! CLC Extreme Clean Carpet Cleaning 575-937-4385 Wax Your Way to a Beautiful Floor
No matter how beautiful a surface in our home might be, the natural tendency is to improve it, especially when it comes to hard floors. Hard flooring can be manufactured from many types of materials, from expensive natural stone to hard wood to synthetic blends, and more. You choose them based on your own tastes, your preferences, and no doubt by doing some research in what is best for your home. One natural chore you may consider is actually an old term. You may want to “wax” your floor. Many years ago, natural wax was used, and it still may be used in some applications today. But the vast majority of products you would use to apply to and protect flooring is actually a synthetic floor “finish.” But for the information here, we’ll use the old term, “wax.” Think before you wax Not all flooring types need or require waxing. Some can even become damaged if you wax them, because of incompatibilities of substances. So do your research. Make sure that the flooring type you have installed in your home requires or can benefit from a coat of wax. Tips for successful waxing Before doing any type of waxing, it’s important to clean your floor completely and remove any old wax as well. A floor stripping product is required, follow directions completely, wear appropriate personal protective equipment (which may include gloves, face mask, etc), and be thorough in the process. Rinse all residues and dry the floor. With your new floor wax product in hand, review the directions. Make sure you know all the steps to take because when you begin the process, it’s not easy to stop. Use a new wax applicator or a new mop, applying the wax as directed, and work slowly and carefully to get an even application, spreading the product with your applicator or mop. Keep it manageable by working in sections and be careful not to work yourself into a corner. Allow the product to dry completely and apply second and third coats if the directions indicate additional applications. Let a pro do it As with many home projects, consulting a cleaning professional is a smart idea. And why not just let them do the job? You may avoid frustrating issues if you do. After all, it pays to call a pro! 575-937-4385  Most of our attention is on surfaces or items at eye level or lower, such as on tables, or the flooring in your home. But when your eyes go up, you might start to notice something frightful… damaged ceiling tiles, and causing you to think “Oh, no, it’s mold!” It’s probably not. Most likely what you are seeing are damaged ceiling tiles from some type of water leak or moisture intrusion. Ceiling tiles are usually made from plants, minerals, gypsum, clay, other natural materials, so are very absorbent and show stains easily. Some are made from synthetic products and might not have as many stains from water leaks or moisture intrusion. Here are a few steps you can take to restore those damaged ceiling tiles. But remember that replacement might be a final option. Remove them Take pictures of your ceiling first, just to avoid the frustration of fitting them back, especially if some tiles are of different sizes. Vacuum your tiles, removing as much dirt and debris you can, which will be concentrated on the topside of them. Wash them You have to be careful now. Over wetting is an issue. In a typical spray bottle, use warm water and a few drops of dish detergent. Mist the tiles until they are damp and use white cloths to clean the surfaces. Use more detergent on heavier deposits of soil. Allow the tiles to dry. Bleach them Set the tiles out that still have stains. What you are going to do now is bleach away those stains. Don’t use chlorine bleach. Get some household hydrogen peroxide, easily found at a grocery store or pharmacy. Hydrogen peroxide is a safe bleach that will slowly remove stains. Mist the peroxide, using it straight (no dilution) over the stained areas of the tiles, and with a soft brush, work the solution into the tiles. The remaining stains often disappear in a few hours. If you see some progress, repeat the process. Paint them Besides replacement, painting your tiles is an option, but you may lose some acoustical ability, since some tiles are designed to absorb sound. It’s a decision you will have to make. And, of course, for any restoration work, such as cleaning of items that are damaged by water intrusion, call your favorite restoration company. After all, it pays to call a pro! CLC Extreme Clean Carpet Cleaning 575-937-4385 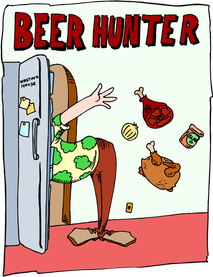 It’s no surprise when you notice a nasty odor from your garbage can, especially when it’s full.
But it might be a surprise when you get a whiff of a nasty smell emanating from your refrigerator, which should normally be a haven of delicious foods and enticing aromas. Your refrigerator naturally fights off offending odors because of the cold temperature, which limits bacteria growth. Most bacteria growth is pretty slow and not as offensive as others. But depending on the source (meat, milk, proteins are quick to become offensive), the resulting odors can be powerful and require immediate action. Simple and easy A complete cleaning of the fridge with hot detergent and water naturally removes some odors. Get into those crevices where liquids from food might have invaded. You might have to wet those areas with hot water and detergent and let it dwell for several minutes. Many nasty odors can come from small amounts of contaminants. For lingering odors, leaving a container, small cup or bowl, of white vinegar in the fridge will continue to neutralize bad odors. For this to continue to work replenish the vinegar every few days. Eventually, you can stop using the vinegar treatment. Some recommend wiping down all surfaces with vinegar as well. And, of course, there is the proven method of leaving a box of baking soda open in the fridge, which absorbs odors. It does this due to the ability of sodium bicarbonate to attract odor causing molecules and holding onto them. Stirring the baking soda around occasionally or replacing the box is necessary. Tough situations You must also realize is that removing odors from a fridge in use is much different from one that has been sitting unused for a period of time. If odors are severe, such as from an unused refrigerator being put back in action, you might have to resort to ozone generation. You can buy or sometimes rent the equipment. Using them is simple. Put them inside the fridge, keep the door shut as much as possible, and let it run for the recommended period of time for that generator. The odor will most likely be magically gone! Of course, the best thing to do for all your cleaning needs is call your favorite cleaning company. After all, it pays to call a pro! CLC Extreme Clean Carpet Cleaning 575-937-4385 The Battle Against Refrigerator Odors
It’s no surprise when you notice a nasty odor from your garbage can, especially when it’s full. But it might be a surprise when you get a whiff of a nasty smell emanating from your refrigerator, which should normally be a haven of delicious foods and enticing aromas. Your refrigerator naturally fights off offending odors because of the cold temperature, which limits bacteria growth. Most bacteria growth is pretty slow and not as offensive as others. But depending on the source (meat, milk, proteins are quick to become offensive), the resulting odors can be powerful and require immediate action. Simple and easy A complete cleaning of the fridge with hot detergent and water naturally removes some odors. Get into those crevices where liquids from food might have invaded. You might have to wet those areas with hot water and detergent and let it dwell for several minutes. Many nasty odors can come from small amounts of contaminants. For lingering odors, leaving a container, small cup or bowl, of white vinegar in the fridge will continue to neutralize bad odors. For this to continue to work replenish the vinegar every few days. Eventually, you can stop using the vinegar treatment. Some recommend wiping down all surfaces with vinegar as well. And, of course, there is the proven method of leaving a box of baking soda open in the fridge, which absorbs odors. It does this due to the ability of sodium bicarbonate to attract odor causing molecules and holding onto them. Stirring the baking soda around occasionally or replacing the box is necessary. Tough situations You must also realize is that removing odors from a fridge in use is much different from one that has been sitting unused for a period of time. If odors are severe, such as from an unused refrigerator being put back in action, you might have to resort to ozone generation. You can buy or sometimes rent the equipment. Using them is simple. Put them inside the fridge, keep the door shut as much as possible, and let it run for the recommended period of time for that generator. The odor will most likely be magically gone! Of course, the best thing to do for all your cleaning needs is call your favorite cleaning company. After all, it pays to call a pro! Removing Hard Water Stains
Unsightly hard water stains can affect many surfaces and can be a challenge to remove. Hard water stains are based on the mineral content of the water in a building or home. It all comes from the ground, so if mineral content is high in ground water, then mineral content in the water you use is going to be high. Water softeners will solve this issue, but without a water softener system, you will occasionally deal with hard water stains and the challenges inherent with removing them. Typical spot removers or household cleaners will not affect hard water stains, because they are mineral based. Here are some tips to remove them safely and enjoy a household free of hard water stains. Identify You will see hard water stains on sinks, around faucets, and even on textiles that are affected by a plain water spill. They are usually white but can be colored stains as well. If the stain is significant, you can even feel the texture of the stain. This means a bit more work may be involved removing the stain. Remove If the surface allows it (make sure you don’t scratch a hard surface and damage it) try scraping away the bulk of the hard water stain, if it has built up enough for you to do this. For a cleaning agent, start safe and use plain white vinegar. Apply the vinegar to the surface and allow several minutes dwell time, remembering that vinegar can temporarily adversely affect copper surfaces. Scrub carefully and see if the vinegar is reacting with the hard water stain. This may remove most hard water stains. If that doesn’t work, obtain a stronger acid, such as from your hardware store, that is for cleaning purposes. Wear safety gloves applicable for strong acid cleaners. Apply carefully and this should remove the hard water stain. You can keep increasing the strength of the acid cleaner until the stain is removed, but always be careful with skin contact and vapors. Follow manufacturer directions. Neutralize As with any strong cleaning agent, neutralize after cleaning. This can be with a water rinse and drying with a towel. Very strong acid cleaners should be neutralized with a product for that specific purpose. But when cleaning challenges are beyond your abilities, do the right thing. Call a professional cleaning company. After all, it pays to call a pro! |
ATTENTION:This is Cody The Carpet Cleaner. Please be aware that I offer a high-end cleaning service. I understand that as a student or renter price is very important, but this is not a "Quicky-Budget" option. I perform a minimum of 7 steps to insure quality results.If your primary goal is quality please give me a call 575-937-4385. Thank You. Archives
March 2024
Categories |
 RSS Feed